 |
| The Teaching Teapot with a Lavender Basket |
Lavender wands require a bundle of fresh, cut lavender. Twenty to thirty stems work well. Long stems are desirable. They should be trimmed so that the stems are an even length. Hold them in your hand so that the base of the flowering parts are even. Then, tie a string or ribbon tightly at the base of the blossoms. A rubber band will work as well, although it is tricky to fasten it tight enough over the blossoms. Secure very well.
Then, gently fold each of the stems upwards so that they cover the lavender buds. The stems will break on one side but will be attached on one side. Bend them upwards individually --- one by one.
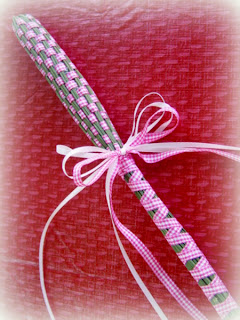
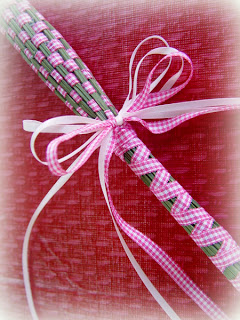
Tuck a piece of ribbon into the folded stems. This should be as close to the base as possible. Then, start weaving the ribbon in and out of the stems. I prefer to do two at a time. Two stems under, then two stems over. This is shown in the picture. As each row is completed, push the ribbon downwards so that it fits snugly against the row next to it.
Continue doing this until all the lavender bud is enclosed.
Continue weaving past the bud portion for several more rounds. This creates a stable base.
Then, wind the ribbon around the stems, criss-crossing them for a pretty effect. Secure where the bulb portion and base portion meet. Hot glue can be used, but I prefer a needle and thread.
Make a pretty bow and attach with hot glue or needle and thread.
All done! Set it somewhere that is dry and out of direct sunlight to dry.
Other things can be made from stems of lavender as well. Lavender bottles are formed the same way as lavender wands, but are left open rather than woven with ribbon. Lavender bud and flowers poke through the stems and the fragrance of the lavender is evident. Lavender bottles are made to be used in linen and lingerie drawers. The dried blossoms may fall off as time goes on and fill you drawer, but if you are like me you won't mind.
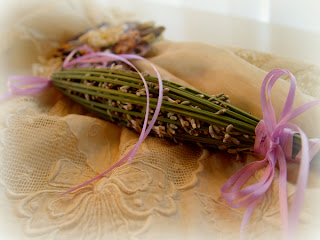
Mussie Tussies are bundles of lavender that are secured at the base of the blossoms and tied with ribbon up and down the stems in a criss-cross pattern. They are pretty because the blossoms are in the open and look pretty. Lavender dries very well, so this makes a pretty bundle that you can leave on a shelf or put in a base to enjoy for years to come.
But, my favorite of all are the lavender baskets. To make a lavender basket, secure a bundle of lavender as though you were making a wand. Continue by folding back the stems. Weave until the stems are woven about half way up the flowers. This creates the "basket". Use a pair of scissors to cut the stems evenly. Secure the ribbon (needle and thread or hot glue). Add a bow if you'd like.
If you would like a handle on the basket, select 3 or 4 stems on opposing sides of the basket. Do not cut them. Fold them so they overlap at the top of the basket. Hold them together by criss-crossing ribbon, thus creating a handle.
Other kinds of dried flowers can be tucked into the basket for variety.
I made this basket with a solid handle. For some reason it seemed prettier than a criss-cross pattern, but it is up to you.
These baskets were some I made without handles. They sit beautifully on potpourri in a pretty plate. Sometimes I glue a craft magnet on the back of a lavender basket so that it can be stuck on a fridge. It's a pretty fridge ornament. Hangers could be added on the back of baskets as well so they can be used as ornaments on a tree.
If you don't have lavender in your garden, check to see if there is a lavender farm nearby that sells lavender by the bundle. Most lavender farms have u-pick areas. If not, check with a florist and see if they can order some fresh lavender for you. Then, have fun and enjoy.


5 comments:
I have made lavender wands, but not baskets. How fun to play with lavender and then tuck them somewhere to scent a special linen cabinet or drawer. Thanks for the tutorial. I think this weekend I may need to play with the lavender. Your creations are all just lovely.
Never seen the lavender baskets before. How pretty!
Thank you for sharing this tutorial. I have always admired the lavender wands and now I know how to make them.
Charming! I think I found my answer...the lavender was not as fresh as it needed to be and so had become too brittle. This really works best if you have your own lavender, right?
Thank you for this tutorial. I've always wanted to learn to make these. I think I'd better go out and cut some lavender and get started!
~Adrienne~
Post a Comment